buildout 安装Plone6 在Ubuntu
How to Install Plone 6 on Ubuntu 22.04 LTS With Volto Frontend

Step 1: First of all login to the server using the ssh command. Eg: ssh username@<IP address>.
eg: ssh root@127.0.0.1
Step 2: Ensure that system is updated:
sudo apt-get update
sudo apt-get upgrade
Step3: The next step is to install some libraries and package dependencies to run Plone smoothly
sudo apt-get install build-essential python-dev-is-python3 libjpeg-dev libxslt-dev python3.8-devYou can change the version number according to your needs if you are installing 6.0.0 keep the same as above
Step 4:Secure your system
install Fail2ban which is used to protect from SSH attacks
sudo apt-get install openssh-server fail2banStep 5: Create a directory to setup the Plone instance
mkdir Plone6-0-0rc1Step 6: Change the directory to Plone6-0-0rc1
cd Plone6-0-0rc1Step 7: Create a buildout.cfg file by the command
touch buildout.cfgStep 8: Open the the file using nano text editor
nano buildout.cfgStep 9: add the lines below to the buildout.cfg
In line extends = https://dist.plone.org/release/6.0.0/versions.cfg set the correct version according to your needs. If you are installing 6.0.0 keep it the same.
[buildout]
extends = https://dist.plone.org/release/6.0.0/versions.cfg
parts = instance

[instance]
recipe = plone.recipe.zope2instance
eggs =
Plone
plone.volto
user = admin:admin
Save and exit the file -> (Ctrl+S and Ctrl+X)
Step 10: Install python3 virtual environment and create a venv using
sudo apt-get install python3-venv
python3.9 -m venv.
Step 11: Install the requirements specified by Plone in a python virtual environment by the command below
bin/pip install -r https://dist.plone.org/release/6.0.0/requirements.txtBy using the python virtual environment it helps to install the python packages locally by setting an isolated directory in the concerned project without affecting the global packages in the machine, which helps to resolve the dependencies and version conflicts and smooth functioning of the application.
Step 12: Use buildout to compose the Plone instance by
./bin/buildoutBuildout assembles all the eggs (python package), with the correct version requirements to solve all dependencies. This doesn’t affect the system python packages at all.
Step 13: After the buildout process run the instance using the command
./bin/instance startThe instance will start to serve on http://localhost:8080/
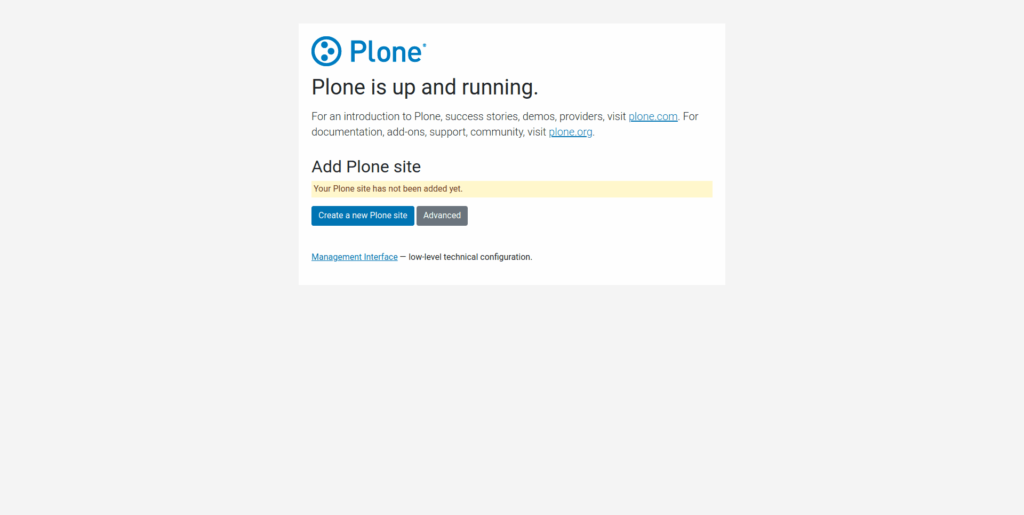
You need to create a Plone site by either clicking the “Create a New Plone Site” or “Advanced.”
For setting up the site compatible with the Volto Frontend, we need to create the site by going to the advanced section. In the future there the configuration will be simpler by having options to create a “Plone 6 Volto Frontend ” and “Plone 6 Classic”.
“Plone 6 Classic“ refers to the Plone site with the classic Plone Frontend (Without Volto).

By using the “Advanced” option, we can configure the add-ons which are to be pre-installed in the Plone Site, which configures the site as per the user’s needs.
Here ensure that “ Plone 6 Frontend (plone.volto)” and “Plone 6 Frontend (Default content on the homepage)” are checked for the Plone backend to work with Volto and create the site.

Here The Plone 6 Backend is successfully created.
The next step is to Configure the Volto Frontend.
Installing Volto
Step 1. Run the nvm installer
In your terminal, run the nvm installer like this:
curl -o- https://raw.githubusercontent.com/nvm-sh/nvm/v0.39.1/install.sh | bash#or
wget -qO- https://raw.githubusercontent.com/nvm-sh/nvm/v0.39.1/install.sh | bash
Step 2: Update your Profile Configuration
If it doesn’t automatically add nvm configuration, you can add it yourself to your profile file:
export NVM_DIR="$([ -z "${XDG_CONFIG_HOME-}" ] && printf %s "${HOME}/.nvm" || printf %s "${XDG_CONFIG_HOME}/nvm")" [ -s "$NVM_DIR/nvm.sh" ] && . "$NVM_DIR/nvm.sh"Step 3: Reload the shell configuration
With your profile configuration updated, now you will reload the configuration for your terminal to use:
source ~/.bashrc
Step 4: With the above command executed, nvm is ready for you to use. You can confirm that nvm is installed correctly by running:
nvm -v
Step 5: Install any active LTS version of NodeJS (https://github.com/nodejs/release#release-schedule):
nvm install 16
nvm use 16
Step 6: Test NodeJS
node -v
Step 7: Install Yeoman, a scaffolding tool.
npm install -g yo
Step 8:Install Yarn Classic
Open the terminal and type the following:
curl -sS https://dl.yarnpkg.com/debian/pubkey.gpg | sudo apt-key add - echo "deb

https://dl.yarnpkg.com/debian/ stable main" | sudo tee /etc/apt/sources.list.d/yarn.list

sudo apt update && sudo apt install yarn
Test it :
yarn -v
Step 9 :Install Volto
Open terminal and execute:
npm install -g yo @plone/generator-volto# install latest stable release
yo @plone/volto
Step 10: Change directory to the newly created folder myvolto (or the one you’ve chosen):
cd myvolto
Then Start Volto with : yarn start
This command will launch Volto in development mode and create an in-memory bundle. Launch a browser and visit http://localhost:3000
To run Volto in Production mode
Run this command in a terminal from “myvolto” folder to build volto.
sudo yarn build && PORT=3000 yarn start:prodYour site is not in http://localhost:8080/Plone
And for example “http://localhost:6666/Newsite”
sudo PORT=3000 RAZZLE_API_PATH=http://localhost:6666/Newsite yarn build

sudo yarn start:prod
To run in the background
Step 1: Create a start_plone.sh
nano start_plone.sh##!/bin/bash
cd /home/ubuntu/Plone6rc1/frontend
yarn start:prodStep 2: Make the file executable
sudo chmod +x /home/ubuntu/start_plone.sh
Step 3: Create a service to run Plone
sudo nano /etc/systemd/system/plone6.service[Unit]
Description=Plone6
Documentation=http://www.cybrosys.com
[Service]
# Ubuntu/Debian convention:
Type=simple
User=ubuntu
ExecStart=/home/ubuntu/start_plone.sh
[Install]
WantedBy=default.targetStep 4: Run Plone6 Volto
sudo systemctl start plone6.service
Step 5: Check the status of the service by using the following command
sudo systemctl status plone6.serviceStep 6: You can access to Plone 6 volto frontend by the following URL.
“http://<your_domain_or_IP_address>:3000”
